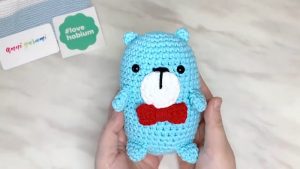
The Crochet Panda In Bamboo Tub Pattern is a delightful project that brings joy to any crocheter. This pattern guides you to create a cute panda nestled inside a bamboo tub, making it perfect for decor or as a unique gift. The panda has a round body, with simple and easy-to-follow steps for the ears, nose, and eyes, ensuring it looks absolutely adorable. The bamboo tub features neat lines and a lovely color change section, adding to its charm. This charming panda and bamboo set, creating a beautiful handmade piece for their collection.

Why Love This Pattern?
- Creative Structure: The pattern appears to have a clear and organized structure, with each part broken down into rounds (R1, R2, etc.), which can make it straightforward and satisfying to follow.
- Color Change: The mention of a color change adds an element of creativity and personalization, allowing you to play with different color combinations and make the finished product unique.
- Detail and Customization: With instructions for sewing the nose, eyes, and ears, the pattern provides opportunities for customization, making each creation special and unique.
- Fun Theme: The recurring mention of "Bamboo" suggests a theme (perhaps a panda or bamboo plant), which might be appealing due to its playful and thematic elements.

How To Crochet Panda In Bamboo Tub
Materials Needed:
- Crochet hook
- Yarn in the colors specified for the project (main color and a color for the color change)
Body:
Body R1:
- Start with a magic circle.
- Make 6 single crochets (sc) into the magic circle.
Body R2:
- 2 sc in each stitch around. (12 stitches)
Body R3:
- 1 sc in next stitch, 2 sc in next stitch – repeat around. (18 stitches)
Body R4:
- 1 sc in next 2 stitches, 2 sc in next stitch – repeat around. (24 stitches)
Body R5:
- 1 sc in next 3 stitches, 2 sc in next stitch – repeat around. (30 stitches)
Body R6-R7:
- 1 sc in each stitch around. (30 stitches)
Body R8 (color change):
- Switch to the new color.
- 1 sc in each stitch around. (30 stitches)
Body R9-R10:
- 1 sc in each stitch around. (30 stitches)
Body R11:
- 1 sc in next 4 stitches, 2 sc in next stitch – repeat around. (36 stitches)
Body R12:
- 1 sc in each stitch around. (36 stitches)
Body R13:
- 1 sc in next 5 stitches, 2 sc in next stitch – repeat around. (42 stitches)
Body R14:
- 1 sc in each stitch around. (42 stitches)

Ears:
Ears R1:
- Make two ears using the same color as the body.
- Start with a magic circle.
- Make 6 sc into the magic circle.
- 1 sc in the next stitch, 2 sc in the next stitch – repeat around. (9 stitches)

Bamboo:
Bamboo R1:
- Start with a magic circle.
- Make 6 sc into the magic circle.
Bamboo R2:
- 2 sc in each stitch around. (12 stitches)
Bamboo R3:
- 1 sc in next stitch, 2 sc in next stitch – repeat around. (18 stitches)
Bamboo R4:
- 1 sc in next 2 stitches, 2 sc in next stitch – repeat around. (24 stitches)
Bamboo R5:
- 1 sc in next 3 stitches, 2 sc in next stitch – repeat around. (30 stitches)
Bamboo R6-R7:
- 1 sc in each stitch around. (30 stitches)
Bamboo R8:
- 1 sc in next 4 stitches, 2 sc in next stitch – repeat around. (36 stitches)
Bamboo R9:
- 1 sc in each stitch around. (36 stitches)

Bamboo R10:
- 1 sc in each stitch around. (36 stitches)
Bamboo Lines:
- Use the color change area as a guide.
- Use the opposite side as the front.

Assembly:
- Sew the nose onto the body.
- Sew the eyes onto the body.
- Sew the ears onto the body.
- Place the side with the color change at the back.

Outro:
Your crochet project is now complete!


Leave a Reply