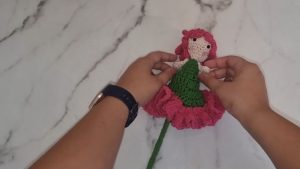
Get ready to create a delightfully soft and realistic-looking llama (or alpaca) using the coziest blanket yarn. This adorable project stands on its own, featuring a playful posture and detailed design with safety eyes, a tiny snout, and perky ears.
Utilizing simple crochet techniques like slip stitches, single crochets, and increases, you’ll shape the legs, body, and neck effortlessly. Perfect as a cute decoration or a huggable toy, this cuddly llama is sure to become a favorite. Follow along to craft this lovable creature with just a few materials and see it come to life, stitch by stitch!

Making Your Crochet Amigurumi Llama/Alpaka
Supplies Needed:
- Alise Veluto Yarn (Chanel Yarn) in dark gray and off-white.
- Bernat Baby Blanket Yarn.
- 4.5 mm crochet hook.
- Thin black yarn for detailing.
- Pair of safety eyes.
- Scissors.
- Yarn needle with an eye large enough to fit thicker yarn.
- Stitch marker.
- Stuffing (polyfill, fiberfill, or stuffing from old pillows).
Step by step Instructions
Legs:
- Start with a slip knot with the lighter color.
- Chain 2.
- Into the second chain from the hook, place 5 single crochets (sc). (This is an alternative to creating a magic ring).
- For Row 2, place 2 sc in each stitch around (10 sc).
- Mark the start of your next row with a stitch marker.
- For the next three rows, place 1 sc in each stitch around (10 stitches per row).
- Leave a tail and snip off the yarn.
- Create a second leg exactly like the first one but do not snip off the yarn.

Joining Legs:
- From the second leg, chain 2 and join to the first leg with a slip stitch.
- Place 7 sc in the first leg.
- Increase (2 sc in one stitch) in the next three stitches.
- Place 2 sc in the chain-2 space between the legs.
- Place three increases in the second leg.
- Chain 9 sc around the remaining part of the second leg.
- Place 2 sc in the chain-2 space from the other side.

Continuing the Body:
- Now you will have 30 stitches around both legs.
- Repeat the process to create an additional set of legs and join them similarly.
- Once you have both sets of legs, attach them by slip stitching 11 stitches along the inner edges of the legs.
- Chain 1 and place 38 single crochets around the edge.
- Place 1 sc in each stitch around for four rounds (39 sc per round).
- Begin decreasing the body by placing a decrease at the start, followed by 27 sc, and three more decreases at the end until you achieve 33 stitches.
- Continue decreasing and crocheting until the body is properly formed. End with 13 stitches for the last row.
- Add stuffing to the body as you proceed.

The Neck:
- Reattach yarn at the top to start the neck.
- Chain 1 and place 17 single crochets around the neck opening.
- For the next row, place 13 sc and 2 decreases.
- Continue decreasing over the next rows until the neck shape is formed.

Head:
- Chain 1 and place 13 sc around the neck.
- Start increasing for the head by placing 1 increase in the first stitch and 4 single crochets.
- Add increases uniformly for the next few rows to form a rounded head.
- Place safety eyes two rows down from the top, positioning them with three stitches in-between.
- Add stuffing to the head.
Snout:
- Chain 2 and work 6 sc into the second chain from the hook.
- Continue forming the snout by increasing and following the pattern until it is formed.
- Embroider the nose and mouth details with black yarn.
- Attach the snout to the head.

Ears:
- Chain 5.
- Work 1 slip stitch in the second chain from the hook, 1 sc in the next stitch, 1 double crochet in the following stitch, 1 sc in the next stitch, and end with a slip stitch.
- Make a second ear and attach both ears above the eyes on the head.
Tail:
- Chain 2 and work 6 sc into the second chain.
- Add a row of single crochets.
- Attach the tail to the back of the alpaca.

Final Assembly:
- Ensure all loose ends are hidden and secure.
- Add any additional stuffing if needed to complete the shape.
Finishing Steps:
- Make sure your llama or alpaka is appropriately shaped and all parts are securely attached.
- Enjoy your cute crochet creation!


Leave a Reply