Get ready to fall in love with the cutest crafting project around—the Crochet Rolling Bear Amigurumi Pattern! This charming pattern features a playful bear that actually rolls, making it as fun to use as it is to create. Perfect as a gift or a delightful decoration, this pattern brings joy and creativity into every stitch, inviting you to add your own unique touch.
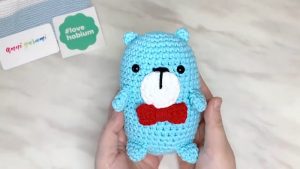
The bear is crafted with simple stitches, forming adorable shapes for the snout, body, ears, hands, and legs—all wonderfully rounded for an irresistibly plump look. You can personalize it with expressive eyes, a friendly nose, and even a bright red scarf.

Why Love This Pattern?
How To Crochet Amigurumi Rolling Bear
Materials
- Yarn in the colors: brown (or white if you want to make a white bear), black
- Crochet hook
- Yarn needle
- Scissors
- Stuffing material
- Stitch markers
- Safety eyes

Snout
Snout R1
- Start with a magic ring.
- 6 single crochets (sc) into the magic ring. [6 sc]
Snout R2
- Increase in each stitch around. [12 sc]
Body
Body R1
- Start with a magic ring.
- 6 single crochets into the magic ring. [6 sc]
Body R2
- Increase in each stitch around. [12 sc]
Body R3
- (1 sc, increase) repeat around. [18 sc]
Body R4
- (2 sc, increase) repeat around. [24 sc]
Body R5
- (3 sc, increase) repeat around. [30 sc]

Sewing the Snout on
- Center the snout on the body and sew it on using a yarn needle.
- Make sure to stuff the snout lightly before closing.
Body R6-R15
- Single crochet in each stitch around for 10 rounds. [30 sc]
Body R16
- (3 sc, decrease) repeat around. [24 sc]
Body R17
- (2 sc, decrease) repeat around. [18 sc]
Body R18
- (1 sc, decrease) repeat around. [12 sc]
Body R19
- Decrease around. [6 sc]
- Fasten off and weave in ends.
Ears
Ears R1
- Start with a magic ring.
- 6 single crochets into the magic ring. [6 sc]
- Slip stitch to the first stitch to close the round.
Hands/Legs
Hands/Legs R1
- Start with a magic ring.
- 6 single crochets into the magic ring. [6 sc]
Hands/Legs R2
- Increase in each stitch around. [12 sc]
- Fasten off and leave a long tail for sewing.

Assembly
Sewing Eyes
- Attach the safety eyes to the head of the bear.
Sewing Mouth
- Use black yarn to embroider the mouth onto the snout.
Sewing Nose
- Use black yarn to embroider the nose onto the snout.

Sewing Ears
- Attach ears to the top of the head with your yarn needle.
Sewing Hands
- Attach the hands to the sides of the body.
Sewing Legs
- Attach the legs to the bottom of the body.

Optional: White Bear
- Use white yarn instead of brown yarn if you want to make a white bear.
Scarf
- The red scarf is from the Gudetama/Pompompurin tutorial, which can be referenced for making the scarf.
Enjoy making your crochet bear!


Leave a Reply